The Mirri Jumpsuit - Papercut Patterns
- di0765
- Apr 15, 2022
- 5 min read
I'm going to share a few thoughts and tips about making this lovely jumpsuit.


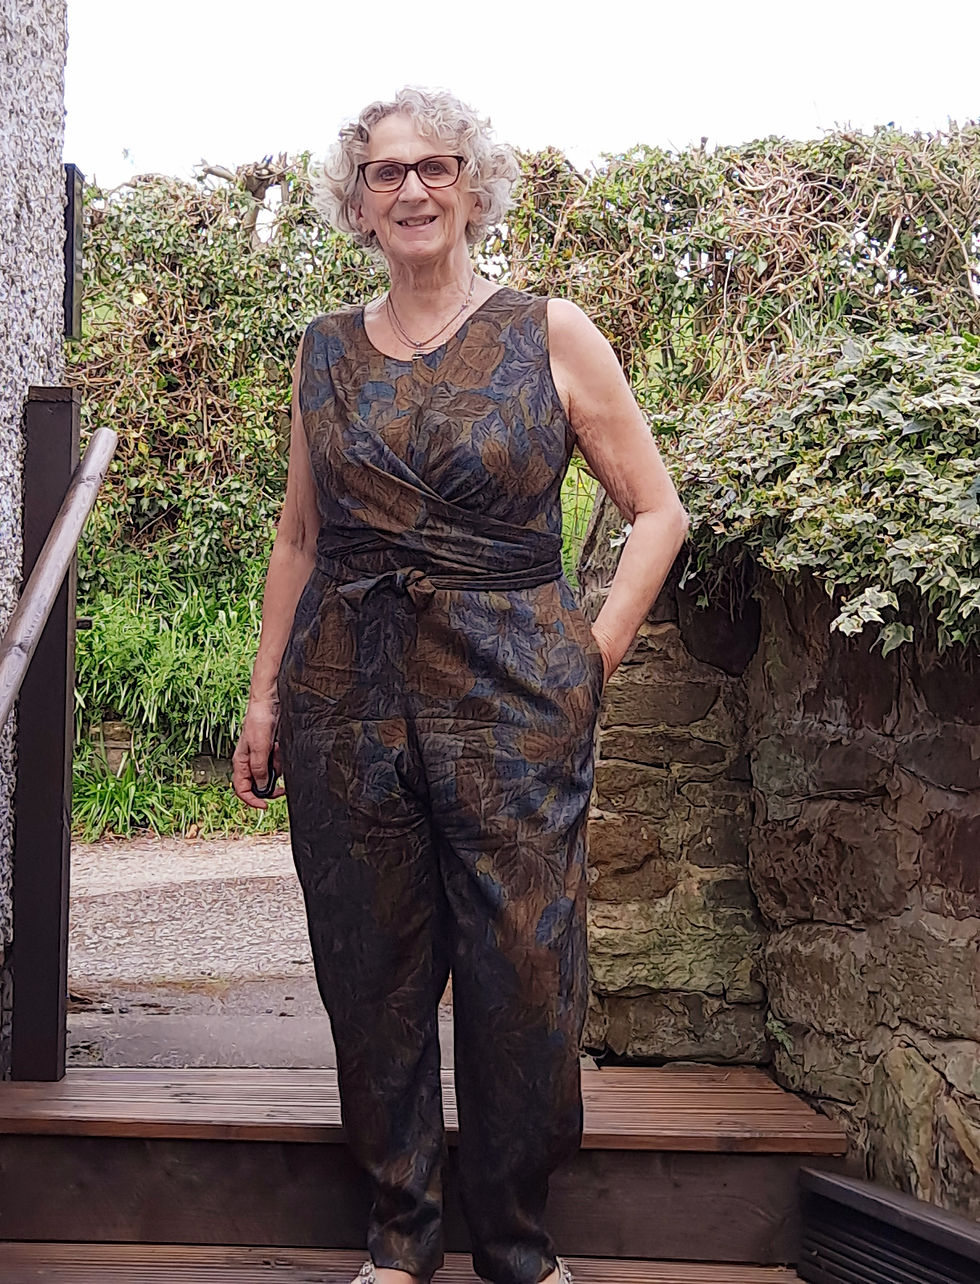
Firstly I'm going to talk fabrics and explain why I've used this one.....which wasn't my first choice...........
The pattern says to use 'mid weight woven fabric, cotton, linen and blends'. Personally I think your fabric choices are much wider, depending on the look you want to achieve.....from floaty etherial, boho, casual, formal to structured. Use brocade for strong statement evening wear.
My mock up was in an unusual twill fabric, which was either a cotton/linen blend or a viscoce type. Although it held folds well it had a lot of diagonal movement. When I wore it had the look of 1930s bias cut jumpsuit, a little clingy round the hips with elegant floaty legs! BUT it was in a peachy colour that I really wasn't going to wear, so I dyed it and it shrank vertically by about 10"..............I did resque it by turning it into cropped trousers using the ties round the waist............you'll find those in my Instagram posts.
I'd always intended to use a linen/viscose/lycra mix that had a small amount of stretch, but there was no way I was going to get this pattern out of 2m.....the ties attached to the bodice make it a fabric hungry pattern.....then I remembered a lightweight wool mix that had been donated to my sewing group back in 2019.

The pattern can be made with or without sleeves and it should be quite easy to lengthen the sleeves as well. The waist tie makes interesting folds across the bodice which gives the eye a focus point at centre waist widening towards the shoulders.
I don't often make mock ups, but I'm only 5'3"...well I might only be 5'2" now.... I couldn't decide how much I needed to shorten the pattern both above and below the waist and wasn't sure how the tie might affect the fit. I removed about 1" above the waist and considerably more from the body of the trousers, however I already knew I'm really short in that area.
Altering the bodice posed a bit of a problem. Because the tie is attached and creates the fullness for the bust there's no horizontal line to alter the length.

I started by folding out the 1" at right angles with the centre front, then did the same from the side seam.....see the red line I've marked above. It's probably best if this line runs just below your bust point. That means measuring from your neck/shoulder point to the fullest part of your bust and then measuring that distance on the pattern. There was no way this was going to lie flat so I just had to make a few small folds in the paper to distribute the fullness. To lengthen the bodice you'd cut along the red line and open a gap the required amount, then draw a new side seam joining the top and bottom of the side seam. An FBA will be tricky, but I'm sure I could help you...just get in touch.

You do need quite a bit of space for cutting as everything is cut on a single layer..........never easy even if you're lucky to have a large cutting table.
The instructions seem easy to follow, although I changed the order slightly. I made the sleeveless version and took the zip upto the neckline as I didn't want to fiddle with a button loop behind my neck everytime I went to the bathroom! I guess that might be a SewOver50 thing.
I used the instructions for the front and back bodice with just a slight refinement for the all-in-one facing. I used a lining fabric which I didn't want to peak out along the edges, also understitching into the shoulder areas is really tricky. My method works well when you line things as well.
It's based on the principle of 'turn of the cloth'.......The outer layer needs to be slightly larger than the under layer so when sewn together the lining/facing lies flat and the outer layer rolls very slightly to the inside.

When matching the facing to the main fabric allow the facing to stick out about 2-3mm. The main fabric won't be lying flat. Sew the seam the correct distance from the edge of the main fabric, clip any curved seams.

When you turn the fabric the right side out the facing lies flat and the body fabric has rolled to the inside.
When sewing the front and especially the back body seams of trousers I like to stretch the seam allowances around the curves. This area is cut on the bias allowing it to stretch. Although it works best with wool fabrics it is possible with others as well.
After sewing the seam, place it on your ironing board and try to straighten out the seam allowance by pulling them whilst pressing. Use steam to help this process....however it's just the allowances you're stretching.

When you press the seam open the allowances will lie flat because you've lengthened the edges.

I was really pleased to see that the side seam pockets used the same method as my favourite one. It reduces bulk and is perfect for French seams if that's what you prefer. I have a more detailed tutorial

Add a strip of interfacng to the front side seam and mark the pocket opening.

I chose to extend the pocket bags up to the waist seam. This supports the pockets stopping them sagging. Put one pocket bag right side against the right side of the front trouser.

Sew from the side seam to the seam allowance, needle down and pivot. Sew down the to the end of the pocket, needle down, pivot and sew to the edge.

Clip into the corner at both ends of the pocket. Turn the pocket to the inside. Press the seam allowances towards the pocket bag.

Understitching isn't essential, but it will help to get a crisper edge. Sew through the pocket bag and the seam allowances about 1mm from the seam.

Press the pocket opening. You should have right angle at the top and bottom off the opening.
At this stage I moved away from the instructions and stitched the trousers to the bodice before sewing the side seams. There's 2 reasons for this
It's easier to sew in the zip whilst the back isn't sewn to the fronts.
After sewing the zip I can check the fit and make alterations to the side seams if necessary.
I prefer to sew the seam before adding an invisible zip as I get a much neater finish at the bottom. Preperation is everything in getting a really invisible zip. Check out my method and how I finish the top with a facing or lining. It's on my Zips Page which can also be found from Tutorials
My only dilemma was the width of the trousers. The pattern's designed with wide legs which don't really work for me...yet I see many people who love them.
I tapered both the outside and inside leg seams so the hem circumference was about 48cm.
THEN
I sewed again about 3cm inside the side seam, stopping about 15cm above the finished hem depth. I turned the hem up after pressing the pleat open

I like the versatility of this pattern. With or without sleeves, interesting details and the tie waist makes it easy to wear. The sleeveless version is perfect for summer casual and more formal occasions and can be worn over lightweight jumpers to make it practical all year round.


Comments